Scratchbuilt sci-fi desert town
Bit of a change of pace from usual programming, but fun nonetheless.
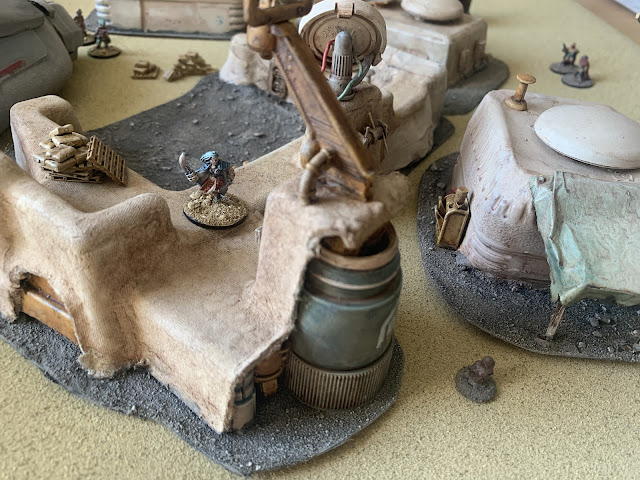
I recently completed a project that's been brewing for a while: Scratchbuilding a science fiction desert settlement out of junk. Making your own Mos Eisley facsimile seems to be one of those bucket list items for sci fi wargamers - a project everyone wants to get round to eventually. And 'eventually' is the key word here: I've had some of these cardboard boxes and yoghurt pots sitting around in my materials box for years! Reading up on Chris McDowall's The Doomed and trawling Magpie and Old Lead gave me the inspiration to finally sit down and start gluing and painting. Witness some of the results below.
Some quick notes on methods I used: I built all of this in 15mm scale. I actually started collecting sci-fi in 15mm specifically so I could more easily build terrain like this. And it is a lot easier - I don't even know how much time and effort it would have taken to try to churn out the same amount of coverage in 28mm. I almost certainly would have given up partway through. Of course, it also helps that the minis are absolutely as cheap as chips.
For materials, I basically looked for old containers with interesting volumes that looked either (a): inherently sci-fi, or (b): like they would provide interesting angles to fight around, or both. Particularly good for (a) was an old carbon monoxide alarm casing that I took apart, which you can probably spot in the pictures; particularly good for (b) was some packaging used for delivering a laptop, which I carved apart and used for several things, including the 'radio station' pictured below, which is something of a centrepiece.
 |
| Oh no - wasteland punks have taken over the radio outpost! They're going to broadcast their post-post-punk music to the whole system! |
 |
| Unfortunately this photo cuts off the top of the radio mast - blame the idiot behind the camera. I'm super proud of the paint chipping though. |
Again, working in 15mm makes the process of finding materials a lot easier, mainly because I was able to look at things like that packaging and think "I'll have that", and take it as one piece, rather than having to think about constructing a building by creating my own volumes, as I would have had to do in a bigger scale.
 |
| Case in point, these power relays are a computer part I found in the gutter, much to the bemusement of my partner. |
For painting, I primed everything with Citadel Wraithbone primer, which adhered very well to basically everything. I then painted rusty portions such as doors with a fairly bright browny-orange mix, doing several uneven glazes with different mixes to get a natural weathered effect (I understand this is a fairly standard way of doing rust). For rusty areas with peeling paint, I painted the rust on first, then stippled paint on fairly unevenly - once you get the hang of this technique, it can look very realistic at scale. I painted some, but not all, of the buildings' walls in a sort of off-white stucco colour, leaving some of them plain Wraithbone, which is off-white anyway.
The key step to making everything look grungy and weathered was applying a thick oil wash, using some artists' oil pain (burnt sienna) mixed with white spirit (which I believe is known as mineral spirits in the US and Canada). I intentionally went very heavy with the oil wash. After leaving it to dry for a day, I went in with a cloth dipped in white spirit (and a cotton bud/cue tip for detail work) and removed oil from the raised areas.
In theory this technique gives a very rich, deep contrast that looks grimy and weathered - and indeed, this worked on some of the buildings. However, as with every time I've used the technique before, I experienced some scratching, where the cloth/cotton bud would scratch through to the basecoat, despite not being applied very hard. In some cases, there also wasn't much visible difference between the start and the end of the process, except a noticeable darkening of hue, something you ought to bear in mind (and I did) if trying this technique. Having reflected, I think that in future I'm just going to use the oil paint like a final wash, rather than using the two step apply thickly -> wipe away process - I did the alternative on some of the non-building models and street clutter, and it worked pretty well.
 |
| Street clutter - Moisture vaporators? Power sources? Who knows? Good for objectives, or just for cover. |
 |
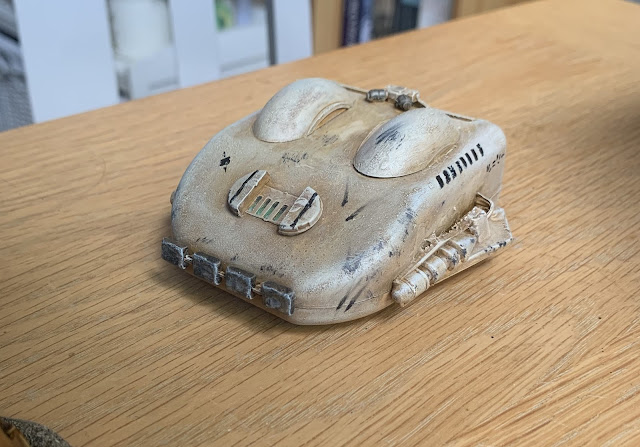
| Not quite a classic deodorant-stick grav tank - this is a stationery-container and dental-floss-dispenser grav tank. |
I intend to use the buildings for various narrative skirmish games, such as The Doomed and a variation on One Page Rules' Grimdark Future: Firefight. I'm writing a set of houserules for the latter to make it better suited to something like "Inq15", as I'm half-jokingly calling it.
 |
| A lifter droid - my first ever scratchbuilt miniature (not counting full sculpts). Inspired by the likes of Bill and Dave. Yeah, alright, theirs are more impressive, but you have to start somewhere. |
On narrative wargaming, I have this impression that the spirit of early Rogue Trader lives on in 15mm sci-fi. There are a lot of things in common: The slightly wonky, very characterful sculpts, almost all in metal, the lack of a single company or range of miniatures with hegemony, creating something like a wild west for collectors, and so on. Of course, the original Laserburn and other Asgard figures are still available in 15mm, which adds to the impression. But the fact that it's so much easier to build your own terrain and do conversions (even though they're metal minis, I've done easy headswaps using old kitchen scissors) makes it feel even easier to do those classic Rogue Trader modelling projects.
Side note: It's a shame Ivan Sorensen's Five Parsecs from Home first edition, which was designed primarily for 15mm, is no longer available. I'm very happy for Ivan's success with Modiphius, as he's spent a long time as a very good indie designer, and it's good he finally got picked up by a big name, but it's a shame to lose a staple of 15mm gaming to the more popular 28mm scale (although my copy of 5Parsecs 1e is still jealously guarded on my hard drive).
 |
| Those doors are actually pretty tall in 15mm scale, meaning this building can work as a trading post or a garage for tanks etc. |
To anyone who hasn't, I thoroughly recommend checking out the 15mm side of sci-fi wargaming. A good place to start is Alternative Armies, formerly 15mm.com. The price alone means you could even have it as a parallel hobby to larger scale gaming - the cost of a 40k squad or so will pick you up a viable army (although for me, skirmish gaming is where it's at - about a third of that cost will get you enough minis to play Grimdark Future Firefight, and maybe even enough to provide both sides). As noted, the sculpts are extremely characterful, and are produced by people with a clear passion; it's a niche of the wargaming hobby that still feels like it remains a hobby-industry, and not simply an industry, for those working in it, which is just a joy to see.
Ironically, no sooner had I finished the project, than we had to move house - I think I got maybe two or three short test games in (all solo) before it all got packed away into storage! (This is why some of the above photos aren't the best - I haven't yet been able to go back and get others.) I can't wait to get it all out again, and stake out a real hobby space to continue working on it. Who knows, with all this grungy space stuff floating around and my D&D campaign finally wrapped up, maybe some Traveller is on the horizon.


This looks terrific. Some great repurposing going on here, and I'm glad I'm not the only one gutter hunting.
ReplyDeleteI've found cable ties glued round wooden cubes make great crates, and the ends of ethernet cables are perfect for 15mm computer terminals.